Easter: our tips for making decorated eggs yourself
As Easter approaches, let your creativity (and that of your children) express itself by decorating your Easter eggs with shimmering colors!
At Easter time , why not imagine pretty decorations to brighten up gardens and apartments, to the delight of young and old alike. Easter eggs can be declined in all colors to decorate your cozy nest. Are you hesitating to get started? We tell you how to do it, from the choice of eggs to decorate to the ideas for personalizing them...
Choose the right eggs to decorate
You can use various materials to make your personalized Easter eggs: natural or synthetic, recycled or manufactured. You will easily find a support for your DIY in your kitchen or in a hobby shop.
Choice #1: real eggs
Brown or white, small or large, bring a few eggs that you want to decorate. Start by gently cleaning them so that you can work on a clean surface. Once dried, the egg will need to be pierced in several steps:
- Prick the top of the egg gently with a pin (in order to prevent the pin from going inside)
- Plug the hole with your finger and shake the egg to merge the yolk and white.
- Enlarge the hole using a thicker nail.
- Repeat the operations number 1 and 3 on the underside of the egg.
- Place the egg on top of a container. Blow inside from the top in order to empty the contents from the other end.
Your emptied egg is ready to be decorated. Do not forget to put the contents of the egg in a container in the refrigerator while waiting to use it in a cooking recipe!
Choice #2: fake eggs
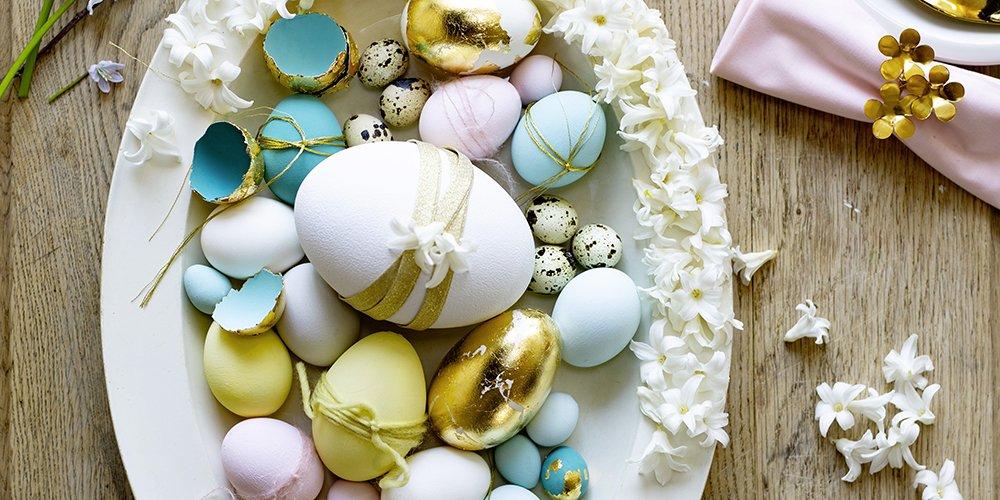
There are many creative ways to make your Easter eggs at home. You can find eggs in stores in:
Choose the material that suits you best, depending on your project (fragility, durability, weight, manipulation by children).
How to decorate Easter eggs?
That's it, your eggs are just waiting for your creativity to adorn themselves with a thousand colors and textures. Gather your creative customization materials:
Three ideas for installing your decorated Easter eggs
1. Hanging eggs: the Easter tree
Like Edmée, customize your polystyrene eggs, using acrylic paint, glitter and feathers. Once personalized and varnished, hang your eggs on tree branches for a designer Easter decoration.
>> Find all the explanations of this Easter tree on the Edmée Bijoux blog.
2. Festive eggs: the Easter table
Brighten up your Easter table with these charming and festive eggs. Follow Anne Weil's advice to make this tutorial with just a few scissors. A hard-boiled egg will serve as your base, then you can draw a smiley face with a pen and customize it with pretty papers.
>> Follow the festive egg tutorial on the Flax and Twine blog.
3. Easter egg piñata
Combine decoration and fun with these Easter egg piñatas. Creative and fun, these eggs can contain all kinds of sweets and toys that your children will try to recover with a stick as is the Mexican tradition. The list of ingredients is very simple: sheets of newspapers, balloons, flour and water, which you can then decorate using fringed ribbons for example.
>> Discover the explanations (in English) of the DIY Easter egg piñata, by the blogger Oh Happy Day.
And also: chocolate egg DIY
For the most gourmet, this chocolate DIY will delight your taste buds and amaze your guests at the table. Emmanuelle Evrard explains how to make these trompe-l'oeil eggs made with chocolate, cottage cheese and apricot coulis. And yes, the boiled egg can also be eaten at dessert time!
>> Find all the steps on the Popote de Manue blog


![PAU - [ Altern@tives-P@loises ] PAU - [ Altern@tives-P@loises ]](http://website-google-hk.oss-cn-hongkong.aliyuncs.com/drawing/179/2022-3-2/21584.jpeg)
![Good deal: 15% bonus credit on App Store cards of €25 and more [completed] 🆕 | iGeneration Good deal: 15% bonus credit on App Store cards of €25 and more [completed] 🆕 | iGeneration](http://website-google-hk.oss-cn-hongkong.aliyuncs.com/drawing/179/2022-3-2/21870.jpeg)





Related Articles